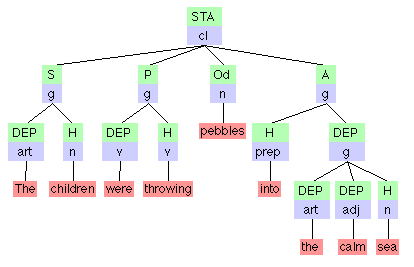
This visualization mode is highly interactive. You have a wide variety of options for viewing the tree structure representing the grammatical analysis of your input sentence - whether this is a pre-analyzed sentence or the result of an automatic parse.
The standard layout is for the tree to show both form and function:
Using an English example, here is a typical tree for the sentence "The children were throwing pebbles into the sea":

The basic options for controlling the display of this syntactic information are found in the horizontal set of menus at the top of the screen:
Here are some of the options available from these meuns:
File: This menu allows you to
Symbols: This menu allows you to
Display: This menu allows you to view the nodes as
Extras: This menu is only relevant in the "Build Tree" mode (more on this below)
Settings: This menu allow you to alter the type, style, and size of font in the applet. There are two basic modes:
Tools: This menu allows you to operate in one of two basic modes
Help: Gives you the guidelines you are currently reading.
A. Start position
"Inspect Tree" is the default mode. The start position will be a "tree-top" label (green for function, blue for form) and a series of branches, one for each lexical item. For example:

In the "Inspect Tree" mode, two vertical buttons are supplied:
If you click on "Expand Tree" when the analysis is in its initial state (as in the tree above), the tree will expand to its maximal state:

Clicking on "Collapse Tree" will return the tree to its minimal state:

Both these states (minimal and maximal), as well as in-between states, can also be achieved by clicking on individual nodes in the tree. Consider again the start state (above). If you on click the STA/cl node, you display the next level (the daughters) under that node:

If you now click on the node marked S/g, you get a further expansion:

Continuing in this fashion, you can eventually inspect the whole tree.
On the other hand, clicking on any expanded node will "collapse" that node, returning it to its earlier state (no daughters). Clicking, for example, on the top node in the above expansion will return the tree to its start position.
A list of form and function labels is given above the tree itself. The function labels are capitalized and in green, form labels are in small letters and in blue:

It is very easy to determine the meaning of any form or function label: simply touch the appropriate symbol - either in the above tool bars, or in the tree nodes themselves - and the full form for the symbol in question will appear above the tree, just below the tool bars. Functions will be in green, forms in blue. Thus, touching STA with the cursor will flash STATEMENT, while touching cu with the cursor yields compound unit.
Instead of simply inspecting the tree which the computer has supplied, you may build and label the tree yourself, while the computer monitors your choices. To do this, open the Tools menu and select "Build Tree".
Note: Currently, there are two "Build Tree" options. The one labelled "old" is an early prototype which has been supplanted by the newer version. We are leaving the old option on the Internet for a while, in case there are users who have become accustomed to that prototype and have not yet switched to the newer version, which is much more interactive and user-friendly.
Having chosen "Build Tree", the start position now looks like this - an unlabelled tree-top node, and one unlabelled node for each lexical item:
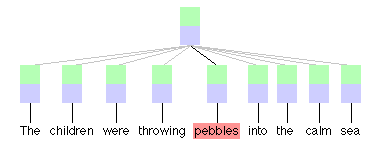
There are two basic ways to build tree structure:
C.1 Using drag and drop
Alternatively, you can use the drag and drop feature to create new structure:
If more than one constituent needs to be dragged to create a larger constituent (a group, clause, or compound unit), each successful drag will be indicated by a colored frame around the relevant nodes: the dragged node will be outlined in blue, and the receiving node will be outlined in red:

When the group, clause, or compound unit is complete, the new node will automatically appear and the color outlines will disappear. Thus, once the node for "the" has been dragged to the node for "sea", you will get the following structure:
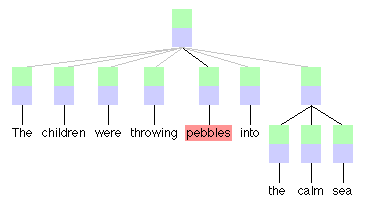
C.2 Using the "Combine Nodes" button
First select the nodes you wish to combine by clicking on each node separately. A black box will appear around each selected node. The following diagram is the result of clicking on "a", "syntactic" and "tree":

The three selected nodes can now be combined by clicking on the "Combine Nodes" button. The result is (once again):

The tree diagram itself automatically provides (as a default condition) some visual clues as to whether more structure needs to be discovered. These clues are in the form of
Whenever the structural path from a lexical item to the tree-top is complete (that is, there is no further intervening structure), that lexical item is given a red background, and all lines connecting that lexical item to the top node are in black (as opposed to gray).
Consider again, the start position for building a tree:

The red background for "children" and the dark line connecting it to the top of the tree indicate that this word does not require any further structural analysis - it only needs to be labelled for form and function. For all the other words, however, more structure must be discovered.
If you do not want this help (selective red color and selective black lines), you can turn off these "Structure Hints" in the "Extras" menu (simply click on "Structure Hints" - it is a toggle switch). The resulting tree will look like this (note that all lexical items have a red background, and all lines are black - so there are no longer any visual clues to tell you how much structure is missing):
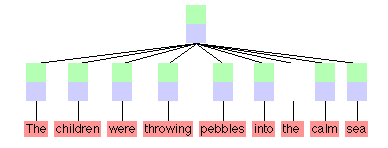
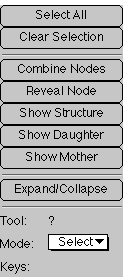
If you wish, you can ask the computer to reveal some or all of the tree structure for you. There are three types of help available - all in the form of clickable buttons in the vertical bar:
If you select a node and then click on "Show Daughter" or "Show Mother", the computer will reveal the node immediately above or below, respectively (if there is one). Thus, if you select (by clicking on it) the node for "sea" (or "the" or "calm") when your start position is:
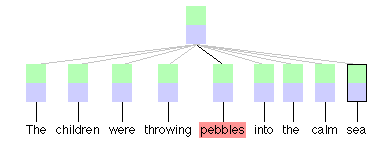
and then click on "Show Mother", the result will be:
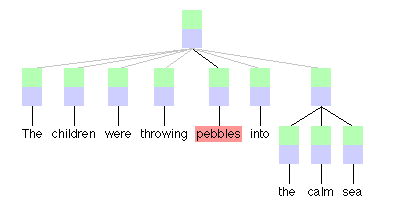
If you do not wish to do any structure building at all, but wish simply to label the nodes in a tree with the full structure displayed, you can click on "Show Structure". The result will be:

E. Labelling the nodes
There are two basic ways to label nodes:
E.1 Click on a label first
Any node in the tree can be labelled with the relevant form and/or function symbol by a) first clicking on the relevant symbol in the top form and function bars, and b) then clicking on the relevant node. For example, you can identify "pebbles" as the direct object by clicking on "Od" in the green function bar and then clicking on the node above "children" (it does not matter where in the node you click). The result will be:
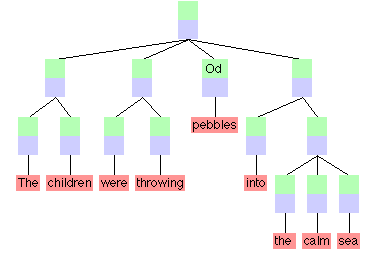
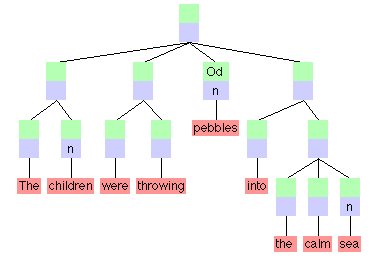
If now you wish to label "children" and "pebbles" and "sea" as nouns, simply click on "n" in the form bar, and then click, respectively, on the node above "children", the node above "pebbles", and the node above "sea". (Note that you only have to click once on "n" in the form bar. The computer will remember this symbol until you deselect it - for example, by selecting a different symbol from the bar.)
********************** (more to come in the near future) **************
E.2 Select the label first
The default notation for displaying syntactic trees is to use the "SPOAC" symbols, and to place the function label above the form label